> ## Documentation Index
> Fetch the complete documentation index at: https://microstrate-1133-notifications-prefs.mintlify.site/llms.txt
> Use this file to discover all available pages before exploring further.
# Getting Started
> Create your account and start building AI assistants in minutes
# Getting Started with QuivaWorks
Welcome to QuivaWorks! This guide will help you create your account and get started building intelligent AI assistants in minutes.
## Quick Start Checklist
Sign up and verify your email address
Set up multi-factor authentication
Choose the plan that fits your needs
Create and deploy your first AI assistant
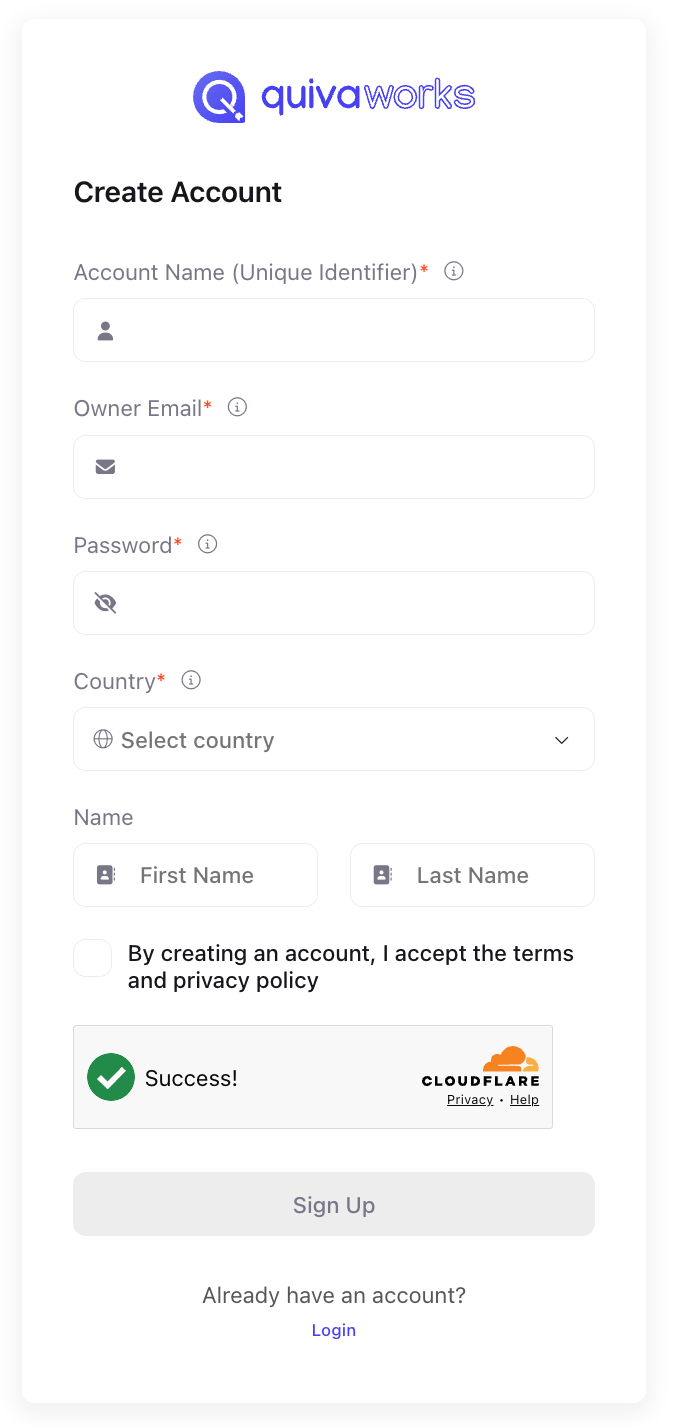
## Create Your Account
### Registration Process
1. Visit [https://app.quiva.ai/en/signup](https://app.quiva.ai/en/signup)
2. Complete the registration form with:
* **Account Name** - Your unique login identifier (case-sensitive). Allows the same email to be used across multiple accounts
* **Email Address** - Your primary contact email (can be changed later)
* **Password** - Minimum 8 characters with uppercase, lowercase, number, and special character
* **Country**
* **First and Last Name**
3. Accept our [Terms](https://quiva.ai/legal.html#terms) and [Privacy Policy](https://quiva.ai/legal.html#privacy)
4. Complete Cloudflare verification - to make sure you're a human!
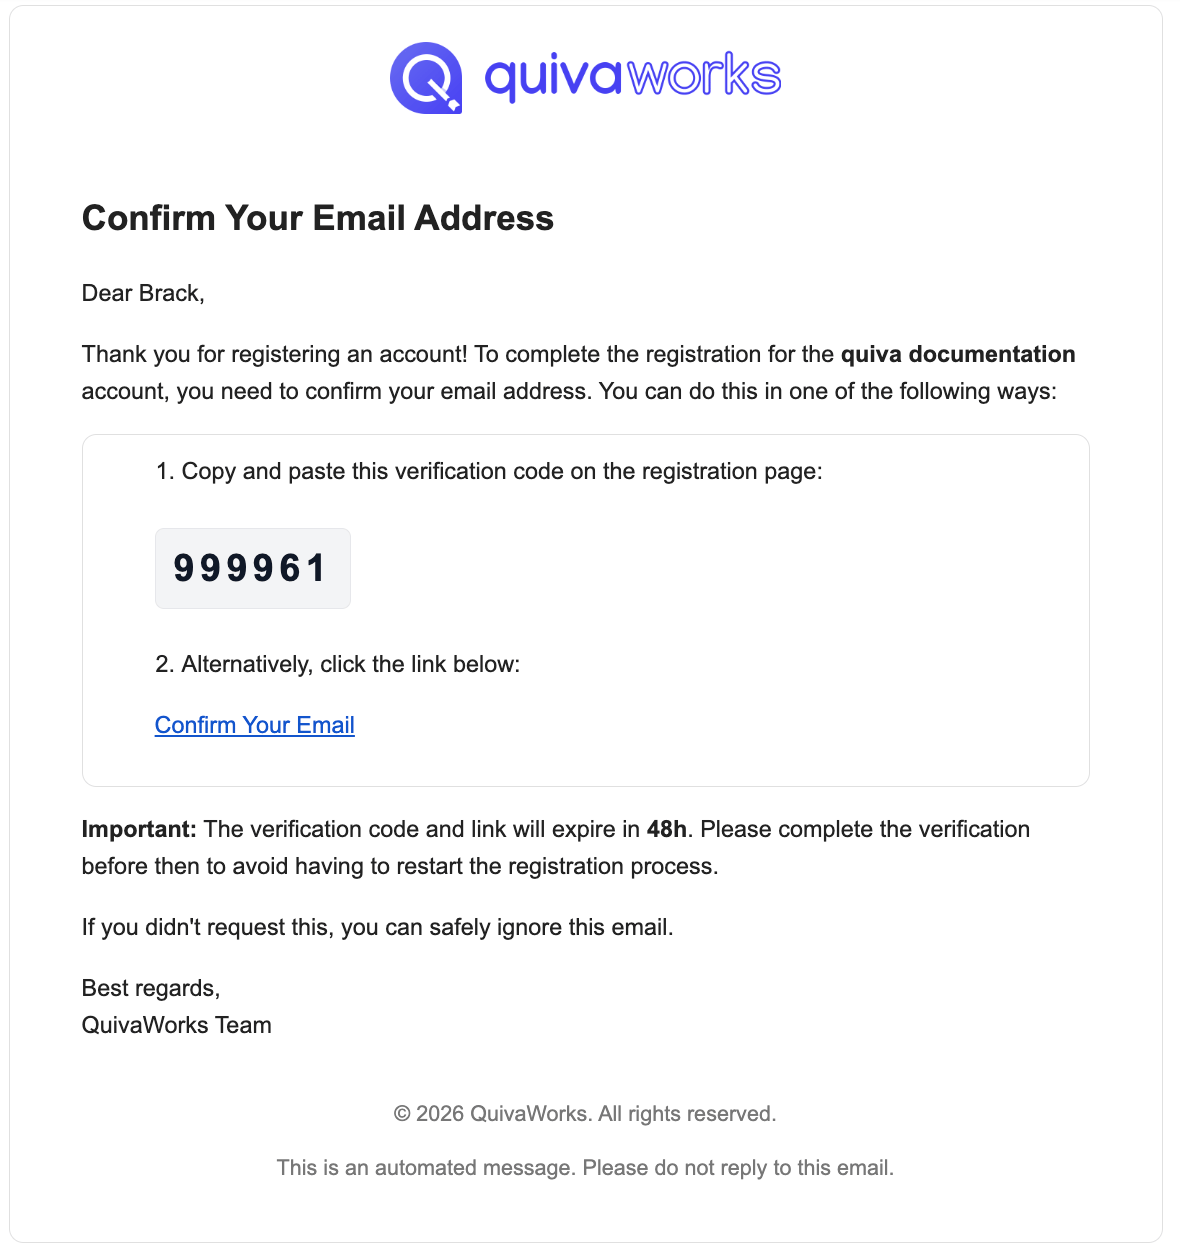
 ### Email Verification
After registration, verify your email using one of two methods:
1. Check your email for "Confirm Your Email Address"
2. Locate the 6-digit verification code
3. Enter the code on the verification screen
1. Check your email for "Confirm Your Email Address"
2. Click the "Confirm your email" button
3. You'll be redirected to log into your new account
Accounts not verified within 48 hours are automatically deleted and must be recreated. Check your spam folder if you don't receive the email within 5 minutes.
### Email Verification
After registration, verify your email using one of two methods:
1. Check your email for "Confirm Your Email Address"
2. Locate the 6-digit verification code
3. Enter the code on the verification screen
1. Check your email for "Confirm Your Email Address"
2. Click the "Confirm your email" button
3. You'll be redirected to log into your new account
Accounts not verified within 48 hours are automatically deleted and must be recreated. Check your spam folder if you don't receive the email within 5 minutes.
 ## Select Your Plan
Choose the plan that matches your needs:
Perfect for exploring and proof of concepts
* Up to 3 users
* 500 included credits per account
* 1GB storage
For growing teams and businesses
* Unlimited users
* 1,000 included credits per user
* 5GB storage per user
For larger organisations
* Unlimited users
* 1,500 included credits per user
* Bring your own LLM keys
For large teams with custom requirements
* On-premise / BYO Cloud
* Custom pricing & resource allocations
* Strategic consulting
You can change your plan at any time. See our complete [Pricing & Plans guide](/get-started/plans-and-pricing) for detailed comparisons.
## Secure Your Account
Before building assistants, secure your account with multi-factor authentication.
We strongly recommend setting up MFA on your first login:
1. You'll be prompted to enable MFA after verifying your email
2. Choose your authentication method:
* **Passkey** (Recommended) - Use biometrics or device PIN
* **Authenticator App** - Use Google Authenticator, Authy, etc.
3. Save your recovery codes in a secure location
Learn more in our [Authentication Guide](/essentials/security/authentication)
## Next Steps
Create and deploy an intelligent AI assistant
Add users and assign roles
Browse pre-built assistants and integrations
Integrate QuivaWorks programmatically
## Need Help?
Comprehensive guides and tutorials
Connect with other builders
Get help from our team
## Select Your Plan
Choose the plan that matches your needs:
Perfect for exploring and proof of concepts
* Up to 3 users
* 500 included credits per account
* 1GB storage
For growing teams and businesses
* Unlimited users
* 1,000 included credits per user
* 5GB storage per user
For larger organisations
* Unlimited users
* 1,500 included credits per user
* Bring your own LLM keys
For large teams with custom requirements
* On-premise / BYO Cloud
* Custom pricing & resource allocations
* Strategic consulting
You can change your plan at any time. See our complete [Pricing & Plans guide](/get-started/plans-and-pricing) for detailed comparisons.
## Secure Your Account
Before building assistants, secure your account with multi-factor authentication.
We strongly recommend setting up MFA on your first login:
1. You'll be prompted to enable MFA after verifying your email
2. Choose your authentication method:
* **Passkey** (Recommended) - Use biometrics or device PIN
* **Authenticator App** - Use Google Authenticator, Authy, etc.
3. Save your recovery codes in a secure location
Learn more in our [Authentication Guide](/essentials/security/authentication)
## Next Steps
Create and deploy an intelligent AI assistant
Add users and assign roles
Browse pre-built assistants and integrations
Integrate QuivaWorks programmatically
## Need Help?
Comprehensive guides and tutorials
Connect with other builders
Get help from our team